
Big change in life circumstances
Without going into detail, I have learned that I have a large mass in my right lung. It is unclear at this point how treatable it is. As I go through things I may disappear at times or maybe permanently. I am considering whether or not to take down my various accounts. Thoughts and prayers are appreciated.
State of teh Mollz
It's been months since I've made a journal entry. I've been pretty active with my Poser rendering and have learned and improved my techniques. My personal life is pretty stable. So what is there to write about in a journal?
As this is an art blog, I'm going to write about my art. The last few posts were tutorials on the use of my primary tool Poser 12. Perhaps it is time to review my journey as an artist.
My art is always imitation of others (anyone who claims to be "original" is really making some strong assertion, there) and not all of those I imitate might be thought of as artists. My strongest influences are the TV programs and movie serials (chapter plays) that I watched as a girl. These include shows like Captain Z-rho, The Adventures of Superman, Rocky Jones, Dragnet, The Twilight Zone and One Step Beyond. Serials I remember include Captain Video, Captain America, Dick Tracy and Commando Cody. You can see that I like silly peril cliff hanger stories and kind of overheated prose. I read comic books, too: mostly Superman DC (transition from late Golden Age to Early Silver Age) and Archie (but also some Marvel and Charlton Comics). Currently I read mostly fiction in the science fiction, mystery and horror/fantasy genre.
My journey involved playing with my spouse and with his help posting pictures in which I was the star, if you will. There are obvious downsides to that, the main ones being I'm a lousy actress (my best performance is to be unconscious; acting turns out to be harder than it looks) and that I've aged out of the roles I would play.
I then discovered Second Life and used it as a tool to tell stories with the help of friends like EnglishDamsel and trinity0666 . Anyone who has spent time in Second Life knows it is a wonderful place that is largely the result of users and not a single corporate entity. If you want a taste of the variety found there you should follow one of the best Second Life photographers I know, my friend MadokaKawabata. I still spend a bit of time in Second Life but as there is only so much time in a day, it's not my primary digital pursuit and artistic tool.
My husband introduced me to Poser and I've worked harder to learn that tool than I have with any other creative tool I've come across. He helped at first but I think I've gone way past his abilities with that tool any more (in fairness, he's spending a lot more time with music these days). I've had a great time telling stories and creating characters using the content available and doing a lot of kit-bashing to make original stuff. I'm on the edge of committing to learning another piece of software like Blender.
Finally, I would say I'm moving from telling pretty simple stories (as from my early TV and Movie Serial influences) to more nuanced stories. As I've moved along I've noted kind of an increase and now a plateau and possible decrease in followers that interact with me. Still the bulk of faving is for my early "real life Molly" material.🙄
Such is the life of teh Mollz...
I've spent the last couple of journals talking about my limited understanding of the photorealistic rendering engines included in Poser 12. Now I think it's time to reveal how little I understand about materials! ![]()
If you have any familiarity with Poser you know the program opens to the main work space. The programmers like to call it a room and the tab at the top says "Pose" so this is the "Pose Room" and where you see what you're working on is in the "Preview" window of the Pose Room. Immediately next to the "Pose" tab there is a tab labeled "Material". Clicking on that tab gives you a smaller Preview Window and a bunch of other stuff. You're now in the Material Room.

The big box with cross-hatching is where things happen. At the moment it's displaying the material that's covering Emoti-Molly's head (Body? Head/Body? Eh.![]() ). The big box is called a "root node" and most of the characteristics of the material are displayed there. For instance, the top line is the "diffuse color" which is a purplish kind of color. About half way down there is a channel for a "Bump" map which adds 3 dimensional characteristics to the material in addition to whatever shape the mesh has. In this case a node called "noise" has been connected to give a hairy appearance to the material since it's supposed to be velvety. Beneath that there is a node connected to "Alternate_Diffuse" which adds to the color definition. The node is called (appropriately enough) "Velvet" and the velvet node adds some refinement to the definition of the color.
). The big box is called a "root node" and most of the characteristics of the material are displayed there. For instance, the top line is the "diffuse color" which is a purplish kind of color. About half way down there is a channel for a "Bump" map which adds 3 dimensional characteristics to the material in addition to whatever shape the mesh has. In this case a node called "noise" has been connected to give a hairy appearance to the material since it's supposed to be velvety. Beneath that there is a node connected to "Alternate_Diffuse" which adds to the color definition. The node is called (appropriately enough) "Velvet" and the velvet node adds some refinement to the definition of the color.
The root node in this picture is an old timey node that's been around forever and is called "PoserSurface". Notice the first two items in a Poser surface are check boxes labeled "Firefly Root" and "Superfly Root". The rendering engine looks at materials and picks the root node checked for it to render materials; that is, since both "Firefly Root" and "Superfly Root" are checked for the cloth on Emoti-Molly's head (Body? Head/Body? Eh.![]() ) both rendering engines will use this as a root node. Firefly likes the PoserSurface node A LOT. Superfly will read the Poser Surface Node for backward compatibility but is capable of using the much more flexible Cycles nodes since it is, in fact, based on the same renderer used by Blender: Cycles 2.
) both rendering engines will use this as a root node. Firefly likes the PoserSurface node A LOT. Superfly will read the Poser Surface Node for backward compatibility but is capable of using the much more flexible Cycles nodes since it is, in fact, based on the same renderer used by Blender: Cycles 2.
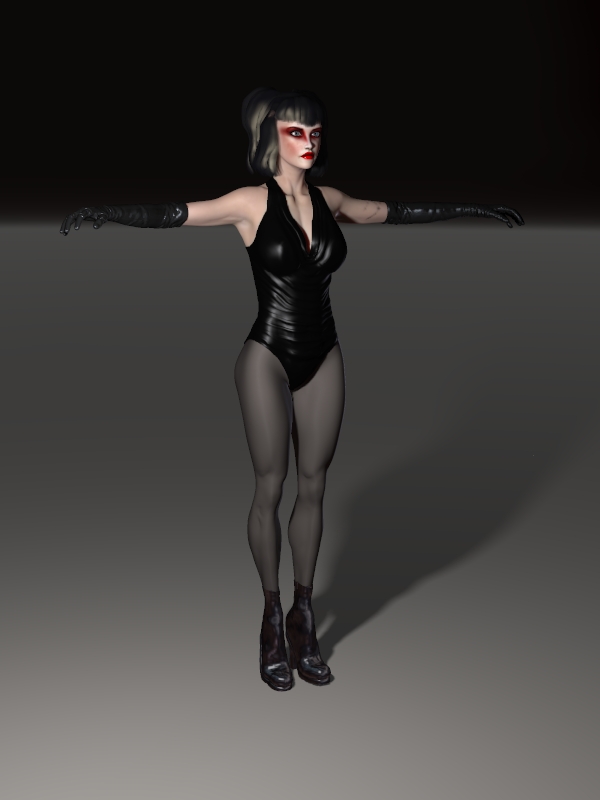
There are two other kinds of root nodes to use for building materials: PhysicalSurface and Cycles. Superfly likes both of these and guess which one it likes best? Cycles, of course. I recently got interested in trying to develop a material which, when applied to the leg of one of my characters would resemble shiny tights or pantyhose. There are some commercially available products that do that job very nicely for the PoserSurface root node but the rendering by Superfly isn't quite as shiny and nice. Below is what I came up with using the PhysicalSurface node (I like using that node as root for Superfly because is it very similar to the PoserSurface node which I'm quite familiar with).

I could have spent a lot more time with it and added details like a waist band, etc. Since this will be under other clothing I didn't bother with all that. Here's what the material looked like:

Notice that there's a PoserSurface root node that Firefly will read and a PhysicalSurface root node that is checked so that Superfly will read it. I'm not about to try and tell you what each modifying node does. The way I managed this material with such a limited understanding of material creation was to load a commercial product, then add the PhysicalSurface root node and make connections and modify stuff until I got something that pleased my eye. As a side note, the preview window does a terrible job with rendering this kind of thing as you can see when you compare the image from the material room with what actually rendered. I do a LOT of test renders when I'm working on tweaking a material.
Unless you are brilliant at the physical properties of materials (teh Mollz certainly is NOT) you want to build up a good library of base materials. There are many great commercial products and a lot of freebies at Renderosity. Particularly look for Dimension 3D materials and Vince Bagna has a very nice set of Superfly only materials. I'm happy to offer other suggestions if you like.
Always keep in mind that Firefly doesn't do well with materials designed for Superfly and often renders them as a black void. Superfly can read most Firefly materials pretty well and Firefly materials can easily be tweaked to show up and look just fine in Superfly. Of course, what looks best in Superfly are materials designed for it. Sadly, every rendering engine has it's own material format. If you're a DAZ Studio user you probably know the older rendering engine 3Delight (which, I suppose, corresponds to Firefly in Poser) uses a set of materials that don't look good when rendered with the newer IRay renderer. There's a cottage industry over at DAZ devoted to converting the materials on great legacy mesh to the IRay format.
As I learn more about materials I'm sure I'll have more to say but that's it for the moment. For one thing, Supefly can see layers! We'll talk about that nex time. This is Molly, over and out!
Picking up where I left off in the last journal entry, Poser has two Photorealistic rendering engines: Firefly and Superfly. Last entry I addressed using Firefly while avoiding the topics of lighting and materials. This time I'll address Superfly which is based on the Cycles 2 rendering engine used in Blender.
First off, it's worth repeating that you can't really do what I'm about to try: divorce rendering from materials and lighting. Any rendering engine will do a better job if it has better content to render so the material on your mesh makes a big difference to the final quality of your rendering. Material format isn't really universal and what looks great in Poser Firefly might not look so great in Poser Superfly. I'll assume that you have pretty good material to render and from this point will just talk about using Superfly to render.
Unlike Firefly which can produce decently photorealistic results without 100% ray-tracing, Superfly is solidly based on ray-tracing. That means that it calculates what it's eye should see based on rays of light reflected (or absorbed) by the materials that you have coated your meshes with. Obviously, that's a lot of calculating and it can take longer to render a picture with Superfly but the results are generally more realistic. A rendering that takes 1 minute and 37 seconds in Firefly can take 4 minutes in Superfly. In Poser 11 where Superfly lacks adaptive sampling it can take nearly 42 minutes. If you like Superfly, that difference in rendering time is a good reason to upgrade to Poser 12.
The other thing about Superfly is that it can take better advantage of the GPU. The times I gave above are based on CPU rendering. GPU rendering times are generally a bit lower and if you have an RTX based Nvidia card they are a LOT lower. Generally though, whatever your capability for rendering, the higher your resolution (bigger image) and higher the quality of rendering, the longer it will take to completely render an image. You can set up rendering to occur in the background which gives you back the Poser editing ability but everything is pretty sluggish because your CPU or GPU is going to be really involved with rendering. I usually try to set up a big rendering project to go overnight. Generally, I do test rendering in very low resolution so that even if I bump up the quality a bit I'll see a quick preview of what I'm doing in a couple of minutes at most. I should mention that Poser has a small ray-tracing window you can open and refresh periodically which serves exactly that function.
Like Firefly, Superfly has some presets you can use as there are lots of bells and whistles you can mess with. I don't tinker with them much and the default is fine for preview but it gives a grainy quality and often causes little bright specks: artifacts of low quality rendering that are called "fireflies" not to be confused with Poser's other rendering engine. The general principle in Superfly is that the higher number of samples of light rays, the higher the quality: less graininess and firefly artifacts.
When looking at the presets you quickly notice that for each level of quality (Low, Medium, High and Ultra) there are CPU and GPU settings. I have a pair of Nvidia GTX1080 GPUs each with 8 Gb of memory. They render pretty quickly but that memory thing can be a nudge. 8 Gb would seem to be plenty but the GPU needs to move all the information about material into it's memory, not system memory. For a really complicated scene like the Supergirl series I am currently rendering that 8 Gb is nearly completely consumed by the texture information required for all the 100s of separate materials in the scene. You'd think that with two cards I actually have 16 Gb of graphics memory but no such luck; just 8 Gb. Therefore, for really complex scenes I have to use the CPU to render. I really pine for an RTX card with a LOT of memory but those are all snatched up by scalpers and the bit coin miners they sell to so you can't lay hands on one for less than about 3,000 dollars. I don't see myself spending that kind of money anytime soon. So, I use GPU rendering for a lot of scenes and fall back on CPU rendering when I have to.
After deciding on the number of samples (1 or 2 for very quick rendering and 10 or more for very high quality rendering) and whether or not you can use the GPU to render you should think about "bucket" size. The bucket is a chunk of memory that defines one part of the picture. As the buckets render you can see your image appear as little squares that gradually sharpen and clarify. Progress with rendering each bucket is indicated by a blue outline that gradually forms and disappears when a bucket is done. Then a new bucket and outline forms. When I am using GPU rendering I usually use a bucket size of 256 and 2 buckets can render simultaneously, 1 for each of my graphics cards. When I use CPU rendering I use a bucket size of 64 or smaller. Since the Renderbox has a 16 core CPU and each core can run two processes I have 32 buckets rendering simultaneously. I know that sounds like it should be fast but it can still take hours for a really big, detailed picture to render.
Poser 12 Superfly is way, WAY faster than the version in Poser 11. This is due to the addition of a feature called adaptive sampling to the Cycles 2 rendering engine that Superfly is based on. The rendering engine has an AI that looks at the number of changes to a bucket with each sample and when that number gets very low (you can decide how low) the bucket is completed and another started even if there were more samples required to meet the quality setting. Some buckets finish with 2 or 3 samples and other require as many as I set the quality for (usually 10 or more). By finishing some (usually a lot) of buckets so quickly, rendering time is drastically reduced and the resulting image is indistinguishable from one that took 10 times as long to render in Poser 11. As teh Mollz is not getting any younger this is great news!
Beside a great increase in rendering speed, Superfly Cycles 2 adds some postprocessing. There are three options: exposure, saturation and Intel Denoise. I prefer to mess with exposure and saturation when I tweak in Photoshop but I find the Intel Denoise option to be somewhat superior to Photoshop (at least in my clumsy hands). It nicely reduces any graininess (of which there is little in my final renders) without sacrificing detail.
Follows are a couple of render examples using Poser 12 Superfly Cycles 2:

Above are the default settings for Superfly Cycles 2. Time to render using CPU: 17 seconds.
It looks just a bit grainy. There are some fireflies.

The default settings saved with the Intel Denoiser. Much of the graininess has been resolved and there are no obvious fireflies.

Above are the Ultra Branched settings for Superfly Cycles 2. Time to render using CPU: 6 minutes 32 seconds. It looks just a bit sharper than the default and I don't really need to deploy the Intel Denoise when saving it. Note that the denoiser is a post production option that doesn't increase rendering time.

Above are the Ultra Adaptive settings for Superfly Cycles 2. Time to render using GPU: 2 minutes and 7 seconds. To my eye it looks as good as the Ultra Branched version. Again, I didn't bother to resave deploying the denoise option.
So I'll start out with the endpoint: rendering. Poser 12, like previous versions, has scads of rendering engines and methodology. Some caveats are in order, though. First of all, I am a hobbyist and not necessarily an expert on anything. Secondly, I am assuming you have some basic knowledge of the Poser interface although I'm happy to get deep in the weeds with you in separate message threads, if you like. Finally, I am a Windows girl so I may not be able to address how thing work on the Mac; it's dangerous to assume that any program works just the same on Macs as on Windows as I have recently discovered since I use a Mac (a bit reluctantly) at the College where I have been teaching this year.
Here's the general deal with rendering. You have 4 main choices: the preview window, Firefly, Superfly and the artsy-fartsy sketch mode. In the preview window you can set up a rendering that is called "toon" mode and looks a lot like comic book art. Most folk (teh Mollz included) choose to set up a scene in the preview window and then render it to one of the two photorealistic rendering engines: Firefly or Superfly. In this journal, I'll address Firefly. I have more experience with it although I'm moving gradually to the other photorealistic engine and I'll have more to say about that next time.
One thing to keep in mind: photorealistic rendering takes TIME. Photorealistic rendering in high resolution takes _T_I_M_E_!!! So, in general, set up things in the preview mode which is very fast and do test rendering with your chosen rendering engine at it's lower quality settings and in very low resolution. When you have things to your liking, switch on all the bells and whistles (well, most of them anyway) and set resolution for ginormous and find something else to do for awhile. Remember it takes TIME!
My husband was using Poser when Firefly was introduced but it was already a mature part of Poser when I started learning how to use the software. At the time, everyone was swooning because the quality of rendering was the best out there but now not as much. If you know what you're doing with it you can still get wonderful results (just look at the erotic art of erogenesisCGI to see some fantastic work with Firefly). Like all photorealistic rendering engines Firefly makes use of ray tracing. It does, however, have some built in short cuts and limitations. I don't intend to do any more technical talk about that as I am far from an expert. What Firefly has to recommend it is incredible control over lighting and materials (the textures that you cover your mesh with).
To render with Firefly you have to choose it in the rendering settings as Poser 12 defaults to Superfly. When you choose it you will get the default settings which give you a pretty quick result if not very high quality. This is what you might get:
The rendering time for this picture (I've posted it with no editing) was just over 49 seconds. For a lot of people that would be enough quality but not for teh Mollz. Below you will find the same mesh. materials and lighting rendered at higher quality:

The settings used are shown below and the resolution on both of these is 600 by 800.

The rendering time was 1 minute and 56 seconds. Note that the character used is Elisabeta by Tempesta3d imposed on La Femme and all the clothing is for Victoria 4 refitted to La Femme using the Poser Fitting room. The light set is by Blackhearted from his Pro Studio lighting.
Below is a higher level of quality that teh Mollz rarely uses: indirect light.

This took 9 minutes and 40 seconds to render. This is the closest to reality that Firefly can manage. The only setting I changed in the program from those displayed above was to tick the Indirect Light box.
You can see why I have used Firefly for so long and why some artists still use it exclusively. It does provide good results and the rendering times aren't too bad. I usually do test renders at about this resolution. My final renderings which I take into Photoshop for tweaking are usually at resolutions like 4000 by 3000 pixels.
I believe that is enough for this journal entry but I'm happy if this interests you and you want to comment (I can certainly learn from you) or ask questions (there's a slim chance you can learn from me!).